Let us begin.
What Do You Need to Use iMessage on PC?
If you are using an HP laptop, you can easily send/receive iMessage texts without having a Mac or iPad. All you need is to have an iPhone and an HP laptop with an internet connection. We are using an app named HP QuickDrop to use iMessage on HP laptops. HP QuickDrop is an app that helps you to wirelessly transfer documents, photos, websites, etc. between your HP computer and Android/iOS devices. Recently, HP added a new feature on the app that allows you to view/reply to your SMS messages from your laptop. This even supports iMessage from the connected iPhones as well. To use HP QuickDrop, your computer should be HP make and have at least Windows 10. Also, your iPhone must be running on at least iOS 12. Now, let’s see how to pair your Windows laptop and iPhone to send/receive iMessages on your laptop.
Set Up and Use iMessage on Windows PC
Here are all the necessary steps to set up the HP QuickDrop app on your laptop and start using iMessage.
Step 1: Get HP QuickDrop App on Your Windows Laptop and iPhone
If you are using HP Laptop, you might find the HP QuickDrop app pre-installed on your device. Otherwise, you can download and install the app from HP’s official website or from the Microsoft store. On your iPhone, search for “HP quickdrop” on the Appstore to download and install the app. Or you can use this direct link as well. (Download: HP QuickDrop)
Step 2: Pair Your Laptop and iPhone
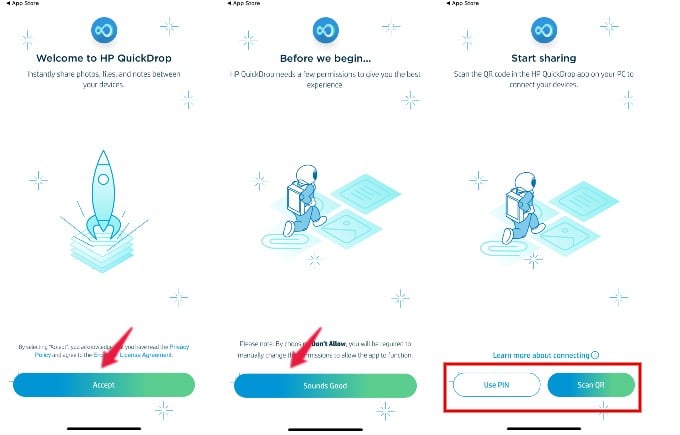
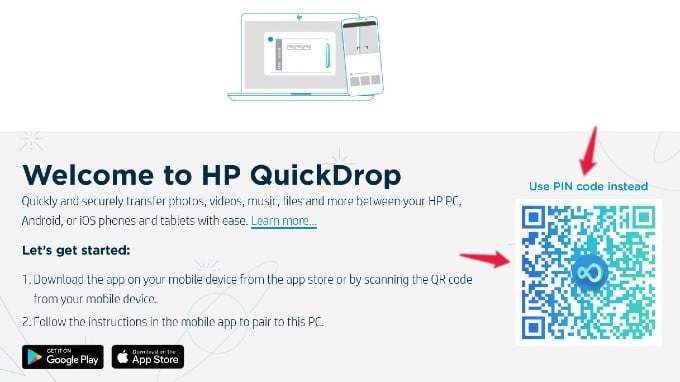
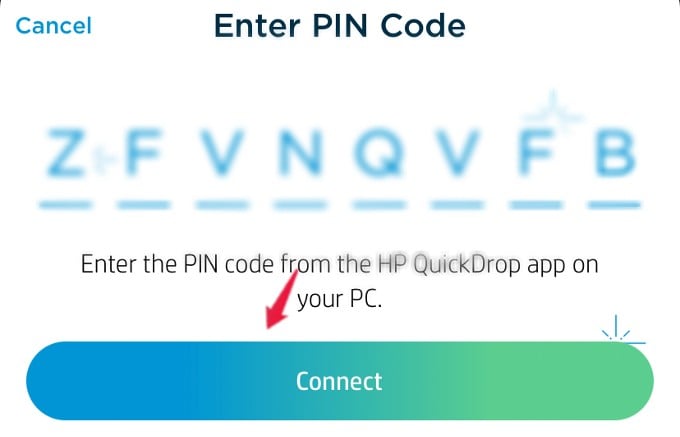
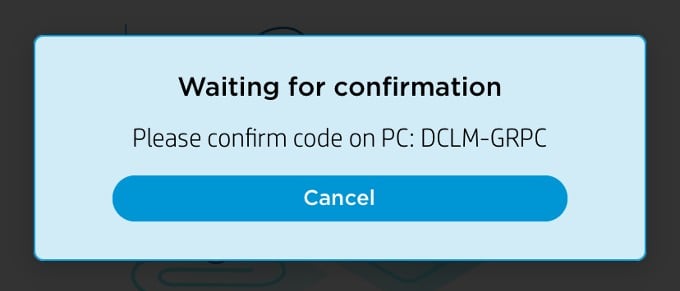
After you had installed the HP QuickDrop app on your laptop and iPhone, the next step is to pair the devices. First, launch HP QuickDrop on your iPhone. When you open the app for the first time, you will be shown a Welcome screen. In that, tap Accept to accept the privacy policy and end-user license agreement. Then, tap Sounds Good on the next screen. Now, you will be seeing a new screen titled Start sharing. On the bottom of the screen, you will see two options Use PIN and Scan QR to pair your iPhone and Laptop. To pair devices using QR code, tap Scan QR and point your iPhone camera to the QR code shown in the HP Quick Drop on your laptop. In this example, we have used the PIN option. For that, click Use PIN code instead located above the QR code on your computer screen and make a note of the PIN-code displayed. Then, tap Use PIN on your iPhone and enter the PIN code shown on the HP QuickDrop app on your computer. Once you enter the PIN, tap Connect. Now, you will see a message “waiting for confirmation” on your iPhone. Go to the HP QuickDrop app on the laptop and click the button that displays “PIN code is the same, continue”. That’s it. Your iPhone and laptop have been successfully paired and you can see the confirmation on the screen of both devices.
Step 3: Provide Access For QuickDrop App to Your iPhone’s Contacts
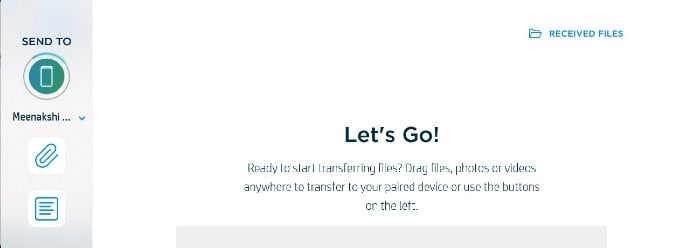
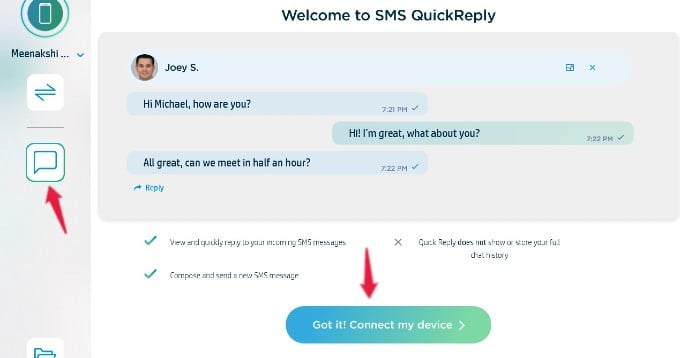
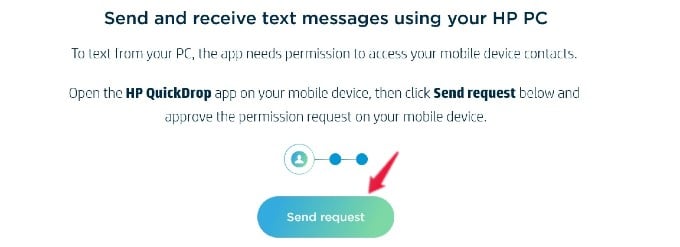
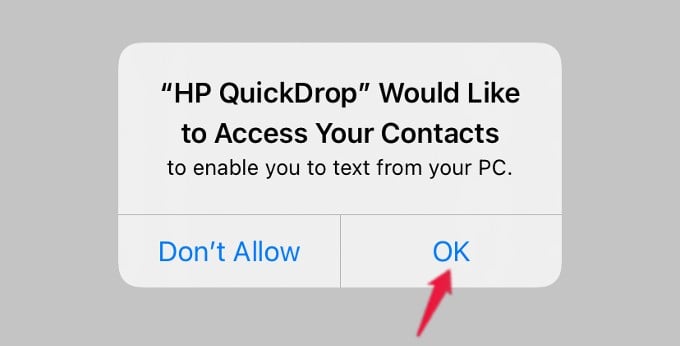
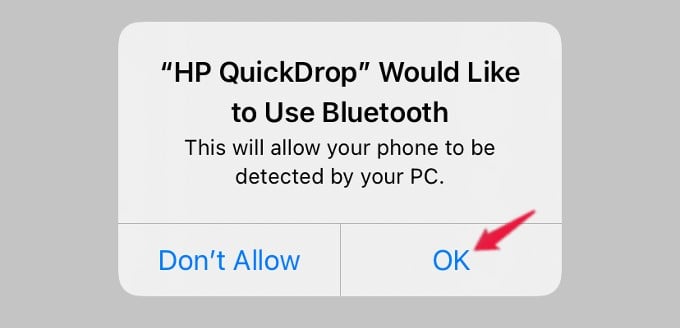
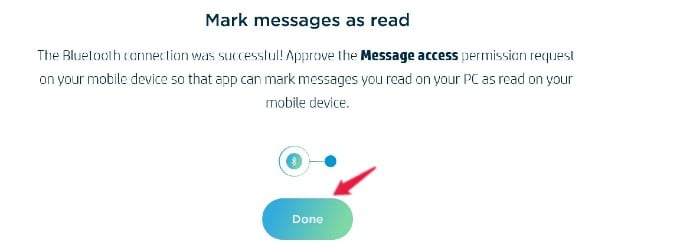
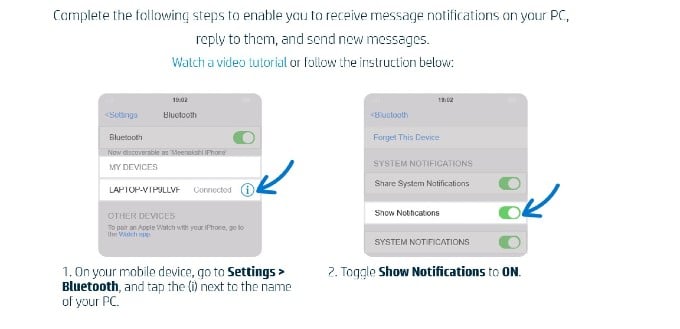
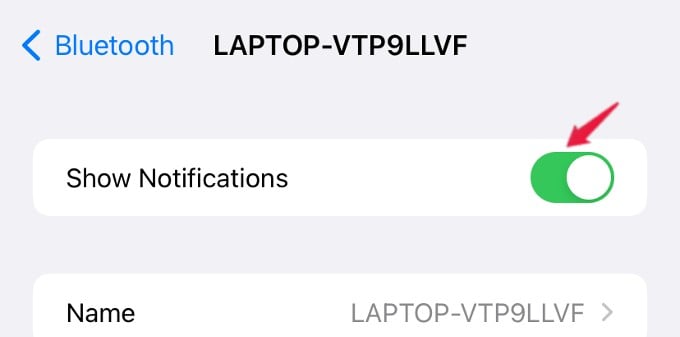
To send/receive iMessages from your laptop, you need to provide permission for the HP QuickDrop app to access your contacts from your iPhone. Let’s see how to do that. First, you need to make sure Bluetooth is enabled on both your laptop and iPhone. Then, click the Message icon on the left of HP QuickDrop app on your computer. Now, your laptop screen will show the title Welcome to SMS Quick Reply while you are setting up for the first time. Go ahead and click the button titled Got it! Connect my device. On the next screen on your computer, click Send request. Then, you will see a small pop-up on the HP QuickDrop app on your iPhone that requests your permission to access contacts. Tap OK. Now, jump back to the QuickDrop app on your laptop and click Pair to connect your iPhone and laptop via Bluetooth. Then, tap OK on the pop-up screen on your iPhone to pair the devices. Make sure Bluetooth is enabled on your iPhone. Then, go to Settings > Bluetooth and ensure that your laptop is listed there. Next, tap your laptop name to establish the connection. Once the Bluetooth connection has been established, you will see the success message on the QuickDrop app on your computer. Go ahead and click Done located below the message. Now, you will see some instructions on your computer screen to receive iMessages on laptop. As per that, go to Settings > Bluetooth and tap the (i) icon located near the laptop name. On the next screen, toggle the field Show Notifications to ON so that you will receive notifications on your laptop for incoming messages.
Step 4: Send/Receive iMessages on your Laptop
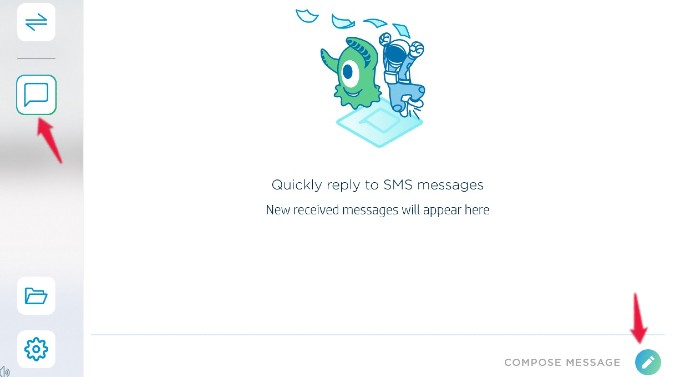
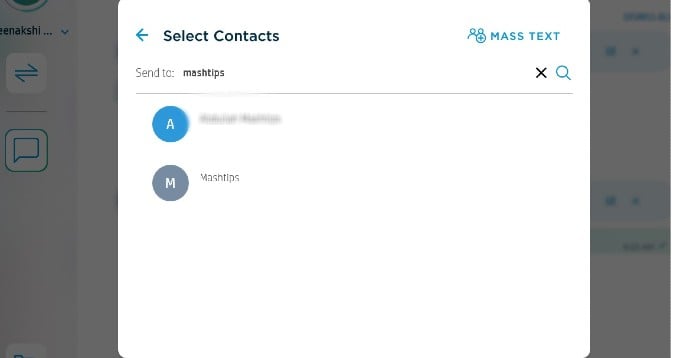
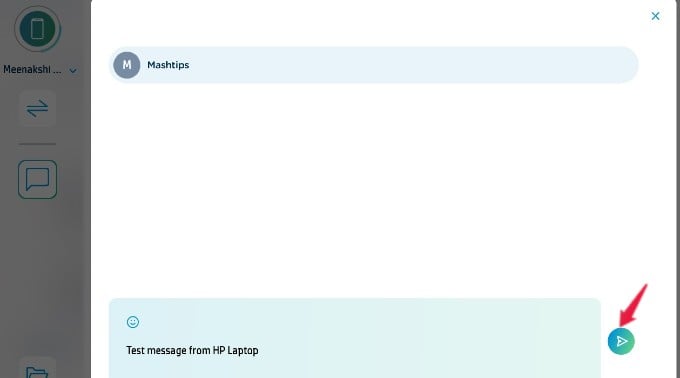
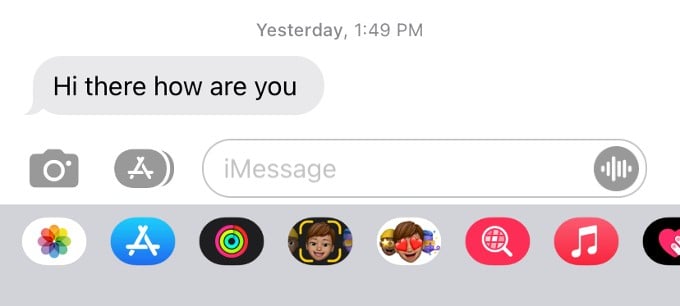
So far, we have completed all the steps that are required to send/receive iMessages on your windows laptop. Now, it’s time to send an iMessage from your computer and check if you are able to receive a notification for an incoming iMessage. To send iMessage, open the HP QuickDrop app on your laptop and click the Message icon on the left. Then, click Compose Message icon located on the bottom right of the app. Here, you will see a pop-up screen titled Select contacts with the list of all your iPhone contacts. Go ahead and select the contact for sending an iMessage. Then, type your message in the box provided and click Send button. That’s it. You have successfully sent an iMessage from your laptop. The sent message can be seen on the Messages app on your iPhone as well. Now, let’s see how to view an incoming iMessage on your laptop. Let’s say you have received an iMessage on your iPhone. Since the notifications are enabled, you will receive a notification on the HP QuickDrop app on your laptop. After reading the message, you can click Reply to send a reply to the sender from your laptop. Do remember that sending/receiving iMessage on the laptop will not work if the Bluetooth is disconnected on either of the devices. Though it might take few minutes to pair the devices for the first time, it will help you to work on your laptop and check the iMessages without the need to use your iPhone.
Δ


